| Information about the LED Taillights |
 |
 |
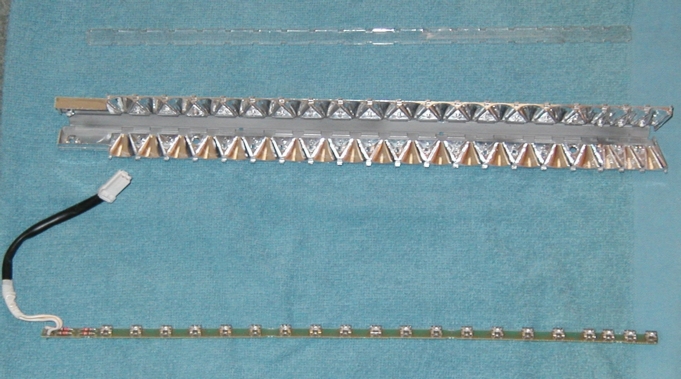
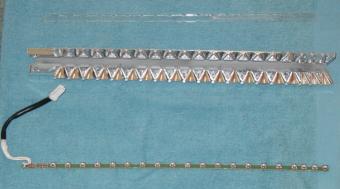
The strip has 20 LED's, and is made by Hewlett-Packard
The following numbers appear on the bottom of the circuit board:
5181-4051 and PCL-10
The first 17 LED's are spaced every 25/32", then 1/2" for 1, then 9/16" for the last two
There are four resistors on the circuit board, all the same color bands: orange, orange, black, green
The reflector for the LED is made by Hewlett-Packard, and has the following numbers: QPWR-G299, E-5041-9048 2 and F2SB-13B500
The LED strip itself is 16" long, and 5/16" wide
The Reflector (LED housing) is 16 3/8" overall long. It tapers out on one end from 16", and is 1/2" wide, and 1 1/8" high
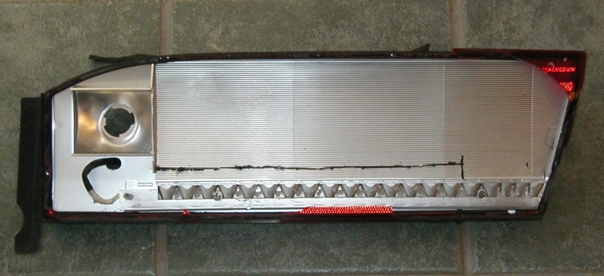
Cutting the Sealed Taillight Assembly
So far, the best way to cut them open is with a dremel tool, using a small diameter cut-off wheel. You have to be careful when cutting, because if you go any deeper than the thickness of the black plastic housing, you will damage the reflector. This is mainly an issue on the long top cut, and the two vertical cuts. The horizontal cut along the bottom can be made deeper. I would scribe a deep line into the housing, where the cuts will be. This will help in making a decent cut.
When looking at the black side of the assembly, you will see two 5/16 diameter
by 1/4" high plastic 'pimples' sticking up. Those are receivers for the two screws that hold the LED reflector in place. Make two horizontal cuts, one that is 1/2" below the receivers, and one that is 3/8" above. Start each one 4" to the right of the right receiver, and end each one just past the left receiver, and just before the gusset for the trunk mounting screw. Then connect the two cuts with two vertical cuts. You should then be able to pull the unit out. The plastic housing is 1/8" thick. Don't cut any deeper than that, especially on the cut that is above the receivers.
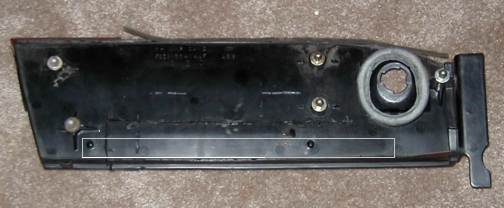
As far as putting it back together, you could glue a couple of plastic strips to the piece you cut out, and then put the piece back in it's original position, and either hot glue it back together, or use warmed up black silicone sealant. Remember that I haven't done this yet, as I wrecked this one purposely to see how it looked from the lense side.
Also note from the picture, that the other side of the black plastic housing is painted silver, and when you glue it back together, the top horizontal cut may show thru the lens.

Rolling Thunder
| Sponsor Links |
|
|
|
|
|
|

|